The BEST Cedar Plank Salmon with Mustard Rosemary Glaze

I am not joking. Many of you will know me for my bad “pun-y” jokes; this is no joke! I have shared this recipe with people before this post and they all agreed with me. Yummy!

Simple. Delicious. That cedar smell….. Le sigh… Cannot be beaten!

I purchased a wonderfully thick plank from Loblaws and have had it sitting around the house for a while. I soaked it for approximately 7 hours. Mind you… It was too big for my sink and biggest cookie sheet so I had to rotate it every hour in the sink! It all worked out just fine, never fear! 

 My salmon was also a buy from Loblaws and it was a wonderful piece that I cut into three. My dad however swears by the darker salmon you can purchase at Costco. He had to agreed though that my piece in my marinade was devine!

Also, fresh rosemary is key. You just can’t beat it!

Here we go! Found on theenchantedcook blog. 

 Ingredients:

  • 1/4 cup whole grain mustard
  • 2 Tablespoons Dijon mustard
  • 1/4 cup brown sugar
  • 2 Tablespoons soy sauce
  • 1 teaspoon Worcestershire sauce
  • 1 Tablespoon apple cider vinegar
  • 2 Tablespoons extra-virgin olive oil
  • 1/2 teaspoon freshly cracked black pepper
  • 1/2 Tablespoon fresh rosemary

Method:

  • In medium bowl whisk all ingredients together. If desired, reserve a small amount of sauce for dipping later.
  • Place salmon in shallow baking dish and pour rest of sauce over. Allow to marinade about 30 minutes in refrigerator (I think mine was in for about an hour).  
  • Place cedar planks on grill for approximately 3 minutes, then flip the planks over and place salmon on them. Close lid and cook for approximately 15-20 minutes or until salmon is cooked through (obviously it is fish and cooking times may vary depending on how thick your pieces are).

Happy Munching!!!


Olé, Olé, Olé! Taco (seasoning) Tuesday!

This Taco Tuesday I am going to give you two brand new recipes to use Taco seasoning in, but no shell in sight!  

 Do you have a member of your family (like me) that does not like tacos? (*cough* daddy *cough*) The mess… all the food in one bite and they are a sectioned eater… Well then these recipes are for you!

They are both so extremely simple that they should be illegal! Then the real kicker is that they are yummy to boot. What is great about Taco seasoning as well is that they can be bought “regular” or “hot & spicy”, depending on the people you are feeding. I recently bought 4 packs for 5$ at Loblaws so I am stocked up!

The first of my recipes today is the Easy Taco Bake!

Ingredients:

  • 1 pound ground beef
  • 15-oz. can tomato sauce
  • 1-1/4 oz. package taco seasoning mix
  • 3 cups elbow macaroni, cooked
  • 8-oz. container sour cream
  • 1½ cups shredded cheddar/mozarella cheese, divided
  • ¼ cup grated Parmesan cheese
  • Garnish: chopped green onions


Method:

  • Preheat oven to 350 degrees and lightly grease a 13″x9″ baking dish.
  • Brown beef in a skillet over medium heat; drain. Stir in tomato sauce and seasoning mix. Bring to a boil and remove from heat. Combine cooked macaroni, sour cream and ½ cup cheddar cheese in a large bowl. Add the beef mixture to the macaroni mixture and stir to combine.
  • Spoon macaroni mixture into the prepared pan and sprinkle with remaining 1 cup of cheddar cheese and Parmesan cheese.
  • Bake, uncovered at 350 degrees for 25-30 minutes, or until hot and bubbly. Sprinkle with chopped green onions for garnish. I also broil the top a little bit since I enjoy the cheesy topping like that 🙂

Yummy!! Was gobbled up!

Second recipe is this easy Southwest Shrimp Salad with Honey Lime Dressing.

Ingredients:

  • 1 pound shrimp, peeled and deveined
  • 2 tablespoon taco seasoning
  • 1 tablespoon olive oil
  • 6 – 8 cups mixed lettuce leaves
  • 1 pepper, deseeded and cut into strips
  • ½ half cup red onion, diced
  • 1 avocado, cut into bite size pieces
  • 1 jalapeno peppers, deseeded and cut into bite size pieces
  • 1 tomato chopped up
  • 1/2 cucumber chopped up
  • Dressing Ingredients:
  • ¼ cup of sour cream
  • juice and zest of one lime
  • 3 tablespoons olive oil
  • 3 tablespoons honey
  • 2 – 3 teaspoons taco seasoning mix


Method:

  1. In a small bowl or cruet, combine the sour cream, lime juice, lime zest, oil, honey and taco seasoning. Stir or shake to combine. Place in the refrigerator to chill while you prepare the rest of the salad.
  2. Place the shrimp in a container with a lid. Sprinkle the taco seasoning over the shrimp. Place the lid on the container. Shake to coat.
  3. Heat olive oil in a frying pan over a medium flame. Add shrimp to the pan, making sure they lie flat and do not over lap. Cook for 3 minutes, or until the side touching the pan starts to turn pink. Flip the shrimp and cook for another 3 minutes. Remove the pan from the heat and allow the shrimp to cool.
  4. In a large bowl combine lettuce, peppers, onion, avocado, and tomatoes. Add shrimp and cheese.
  5. Just before serving, pour dressing over the salad and toss.

Happy munching!!!

Raspberry Sangria

Yesterday my MOH invited me to a lovely backyard BBQ at her home not minutes away. 

As per BBQ culture, it was a BYOB and I decided to wing a Sangria recipe.

The results were fantastic. I am not a fan of red wine so I knew white or rosé were my options and therefore had to think of what would go well with one of those options.

I had raspberries left over from the Chia Raspberry Lemonade and my fall back summer drink is Ameretto and Lemonade. Therefore, my intentions were to head straight for the lemonade section at my grocery store. I was pleasantly surprised to find they make a raspberry lemonade and I was sold. All that was left was to add another hint of flavour and so I chose mint. The “fruits” of my labours were scrumptious. 

This recipe comes from my own brain and as such there is no link for you to directly reach it….. Sorry not sorry 🙂

Here we go! Sorry there are no pictures of the ingredients, but I’m sure you’ll be ok 🙂

You’ll need:

  • 1 bottle white wine – I bought the grocery store Yellow Tail
  • 1 bottle Simply Lemonade Raspeberry Lemonade
  • 1-1/2 cups raspberries
  • Two sprigs mint

Tear the mint leaves and throw them into your pitcher. Put the raspberries into the pitcher and muddle them with a spoon into the mint. Pour both bottles into your pitcher and stir!

Drink responsibly 😉

Happy sipping!


Chia Raspberry Lemonade

Cha Cha Cha chia!

No I did not grow a chia pet – but I did make a chia filled drink!

Chia seeds are one of the super foods that are deserving of the name. Antioxidant filled, protein loaded, and a melange of other factors make them super. 

So when I stumbled upon this recipe I was instantly attracted to its chia goodness, but who doesn’t love raspberry lemonade too!?!?

The recipe can be found on http://www.wifemamafoodie.com.

Makes 2 servings but I only made one this morning so my pictures are of halved ingredients.

Ingredients:


  • 1 cup purified water
  • 3 tbsp chia seeds
  • 2 green tea bags steeped in 1 cup water and cooled
  • 1 cup raspberries boiled with ¼ cup water
  • juice of 2 lemons, about ½ cup
  • ¼ cup honey or other sweetener of choice, possibly more to taste

Method:

Gel Chia Seeds:

  
Combine 1 cup purified water with 3 tablespoons of chia seeds.The chia seeds need several hours to gel, so do this ahead of time, the day before if possible.

Steep Tea:

Steep green tea bags in 1 cup of hot water for 2-3 minutes. Discard tea bags and let cool.

Make Raspberry Puree:

   
 In a saucepan, combine raspberries with ¼ cup water and bring to a simmer over medium-high heat. Mash raspberries to release their juices. Strain through a fine mesh sieve and mash out as much juice as possible. Discard raspberry pulp. Combine the raspberry juice with the green tea.

Blend It All Together:

In a small pitcher or bowl, blend together chia gel, raspberry green tea, lemon juice, and sweetener. Add more sweetener, to taste. Serve immediately or chill slightly before serving. Makes 2 servings.

Happy munching!!


Strawberry Avocado Bacon Wraps

What more can I say?!

Bacon – ✔️

Avocado – ✔️

Strawberries – ✔️ 

This was sooooo easy and is soooo yummy!!! It satisfies all cravings at once – fantastic.

All you need is: bacon, strawberries, avocado, tortilla wrap, lettuce and balsamic vinegar.

Lay a few slices of bacon, about 1/4 to 1/3 of an avocado, a few sliced strawberries,  and some lettuce in a tortilla. Drizzle about a tablespoon of balsamic vinegar on top of everything and wrap it all up! 

Happy munching!!!


Tissue Paper Flowers for Spring

That’s it. I have had it. No more winter! Easter break is on the way and the Easter bunny will need to wear earmuffs and a scarf while he hides his eggs! 

I thought maybe in order to help spring along I’d make a flower to cheer us all up. I will not lie – it’s also a practice for perhaps wedding deco… You never know! 

I found the instructions  on http://www.designeverydayblog.com.

Here we go!


1. Pick some pretty tissue paper, you will want 2 yellow sheets for the centre and 4-6 sheet for the petals depending on how full you want your flower. Lay the sheets of tissue in a pile as neatly as possible.
2. Fold all the sheets over at the same time, you can play with the size of the fold so get different effects but 5-6cm is a good start.
3. Now repeat this fold back the other way.
4. Continue with this accordion style folding until you have folded all the paper. At this point I like to run something hard like a ruler along the folds to make sure they stay.
5. Now you can unfold the tissue and separate the yellow pieces from the rest.
6. Fold the yellow tissue back up, it should go back together nice and easy thanks to that little ruler trick. Fold in half and trim to about half the size it was.
7. Now take a pair of scissors and make lots of long cuts in the yellow tissue.

8. This will now be your flowers centre.  


 9. Now take the coloured tissue and fold it in half, cut the ends into whatever shape you would like your petals to be. The most important part here is to make sure you cut quite a long way down the sides as this will make it easier to form your flower.

10. Now you have your petals and your flowers centre. If you notice any petals that are a little too joined together due to how the paper is folded now is a good time to fix them up.
11. Unfold all your tissue paper again and lay the yellow tissue back in the centre.
12. Re-fold the tissue, this can be a little tricky, just try to get it back together as best you can as it doesn’t matter if it is a little messy.
13. Fold all the tissue in half.
14. Wrap a pipecleaner through the centre of the folded tissue paper and twist to secure.
15. Now start with one side and pull up the tissue whilst fluffing it up, separating each layer to create the centre of the flower.
16. Now do the same with the petal layers. You need to me very gentle so as not to rip the tissue paper.

17. Once you have finished once side its time to do the other side.


And there you have it!  Happy Spring and Happy Crafting!

Heads up!! DIY Knit Headband with Crochet Flower

Winter seems to be never ending here in Quebec… As such, it means cold weather and cute cold weather items are still good to go!

I figured this was an opportune time to post a knit and crocheted headband I made! My cousin commissioned me to make a head band similar to the one her bestest friend lost.  She found this great free pattern and I began to teach myself how to knit and crochet!  There are some wonderful youtube videos to watch in order to teach yourself!

While I knew how to basically knit and purl, I was clueless as to how to insert extra stitches! You know, make it wider!  Then came the decreasing stitches… making it smaller! I will admit I restarted three times…. But third time’s the charm right??

Crocheting was the same deal.  While there are wonderful videos on youtube, it took me three go’s to get the tension right and therefore complete the flower.

Moral of the story… while crocheting is easier, it is a b***h to get the tension and that somehow makes it harder in my eyes.

Anywho, I basically got half of this done in one afternoon and worked a little here and there on the rest.  It could easily be two afternoons if you devoted the time.

The pattern can be found on http://www.krafty-katie.blogspot.co.uk and she even provides google docs for them!

Happy Crafting!


Mini Lemon Loaves

The cold weather here in Montreal has me in a baking mood. When it hits -21C, frankly the outdoors are no place to be and a hot oven adds that extra warmth.

So today I decided to make some little lemons loaves that are perfect for snacking on, breakfast, or dessert! I have made them before and love the fact that they are made with sour cream. The last few desserts I have made have called for sour cream and I have decided that it is one of my favourite ingredients to use while baking. Greek yogurt is also just as yummy.  They add that little extra to your baking!

This recipe is from http://www.tastykitchen.com.

2015/01/img_3497.jpg
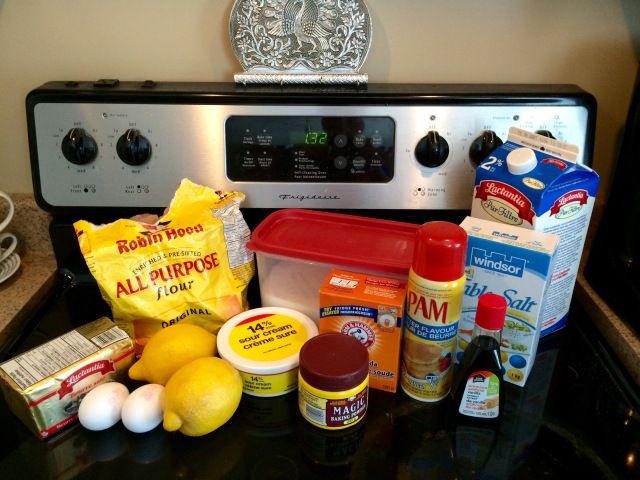
Ingredients:

  • FOR THE CAKES:
  • ½ cups Butter, Softened
  • 1 cup Granulated Sugar
  • 2 whole Eggs
  • 1 teaspoon Vanilla Extract
  • 1 whole Large Lemon, Zested (about 5 Teaspoons Zest)
  • ½ cups Sour Cream
  • 1-½ cup All Purpose Flour, Sifted
  • 1 teaspoon Baking Powder
  • ¼ teaspoons Baking Soda
  • ¼ teaspoons Salt
  • 3 Tablespoons Milk
  • FOR THE GLAZE:
  • ¼ cups Fresh Lemon Juice
  • ½ cups Granulated Sugar

Method:
br />
2015/01/img_3502.jpg

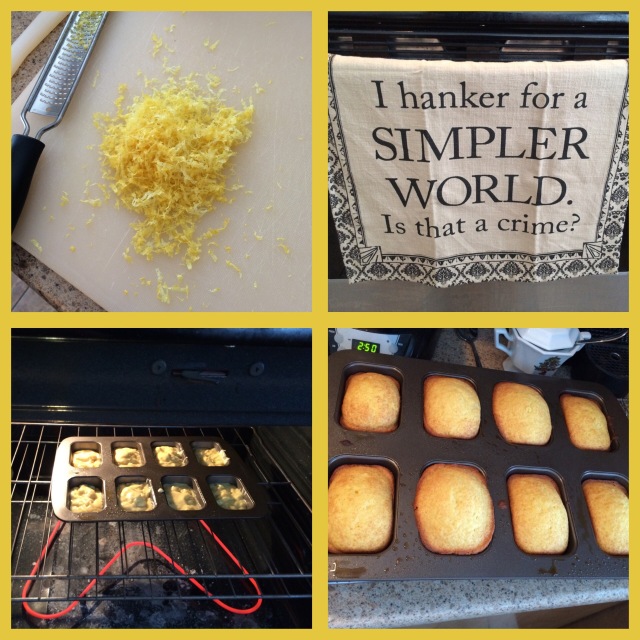
– Preheat oven to 350ºF. Spray mini pans with nonstick cooking spray and set aside.

– In a large bowl, cream butter and sugar until light and fluffy. Stir in eggs, vanilla, lemon zest and sour cream. Scrape the sides and mix again. With the mixer on low speed, incorporate all dry ingredients until just combined, then stir in the milk. Scrape the sides and mix a few more times by hand. Spoon batter equally into prepared pans. Bake 15-20 minutes or until edges are golden brown and are baked thoroughly. Use the toothpick method to see if they are done. Mine were done at 18 minutes.

– While lemon loaves are baking, mix ingredients together for the glaze and microwave on high for 2 minutes, stirring every 20 seconds or so to dissolve the sugar into the lemon juice. The glaze is done once the sugar has dissolved.

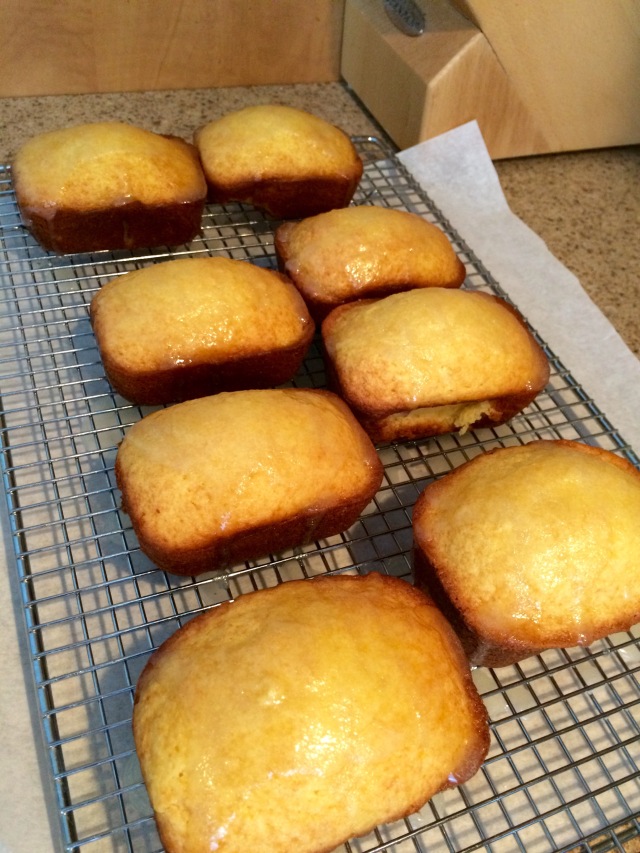
– Once loaves come out of the oven, cool at least 15 minutes before removing from the pans. Spoon glaze over the loaves and continue to cool completely. Store in airtight containers until ready to serve.

2015/01/img_3503.jpg

Happy munchings!!

Christmas Candy Cane Wreaths, Sharpie Mugs, and Simmering Potpourri

Wow… It has been one busy month of December! Between parties, Christmas shopping and decorating, and closing up the school I was teaching in, I hardly had time to blog!

Never fear though, I am back with a few new pieces and they are just in time for some last minute gifts and DIYs. This year I have gone all out with the craftings and the handmade gifts. One of my ballet assistants got an arm-knit scarf, a few people are getting simmering potpourris bags, there are some pedicures in a jar (pictures to follow after Xmas for those!), and a sharpie mug or two!

In no particular order, here we go!

DIY Candy Cane Wreath

/home/wpcom/public_html/wp-content/blogs.dir/fd1/75222657/files/2014/12/img_3123.jpg
I had seen a few of these on Pinterest and decided to try it on my own!

What you’ll need is:
16 unbroken Candy canes
A glue gun
Some red or green ribbon
Cardboard
Christmas Paper

The steps I took are basically as follows:

1. Glue two candy canes at a time together.
2. Cut out a circular piece of cardboard (I think mine was from a box of frozen chicken wings or god knows what…) and arrange the candy canes in the wreath formation. Glue them down.
3. I also glued the points together; I felt like it stabilized the wreath.
4. Cut pieces of ribbon and glue around candy canes – of course this is options. Also cut one long piece to create the part to hang the wreath.
5. Finally, use some Christmas paper to create the centre to cover up the glue and candy cane ends!

/home/wpcom/public_html/wp-content/blogs.dir/fd1/75222657/files/2014/12/img_3203.jpg

Voila! Happy Crafting!


DIY Sharpie Mugs

These make for wonderful little stocking stuffers or fill them with items and wrap for personalized gifts!

/home/wpcom/public_html/wp-content/blogs.dir/fd1/75222657/files/2014/12/img_3175.jpg
All you need is:

Oil based Sharpie Pens (The is VERY important – do not use the regular – they will wash off too easily)

Mugs – I went to the dollar store – They work better than more expensive mugs because they have less coats of shellac for the sharpie to go through when baking.

Steps:

1. Wash your mug!
2. Pencil can be used to plan out the mug – but watch out it easily wipes off!
3. Use your sharpies to draw and colour your mug.
4. Stick them into the cold oven, turn oven to 350° and bake for 30 minutes. Once done, turn off the oven and let them cool down inside the oven.

/home/wpcom/public_html/wp-content/blogs.dir/fd1/75222657/files/2014/12/img_3208.jpg
As a note, I would not stick them in the dishwasher. I would hand wash them in order to preserve it as long as possible 🙂

Happy Crafting!


Simmering Christmas Potpourri 

/home/wpcom/public_html/wp-content/blogs.dir/fd1/75222657/files/2014/12/img_3180.jpg

This potpourri simmers on your stove top just like my fall “Witches Brew“.  However, this one has a more festive scent.

I got the idea from this lovely lady’s blog: cleanandscentsible.com

What you need:

Oranges, lemons, whole cloves, bay leaves, cinnamon sticks

Clear plastic wrapping paper, twine or ribbon

Paper or a printer for instructions

How to:

Wrap one orange, one lemon and either double the amount of spices so they can make it twice or make sure to write down that it is only enough for one pot.

On printer paper or by hand include the instructions:

  • 1/2 an orange, cut or sliced
  • 1/2 a lemon, cut or sliced
  • 3 cinnamon sticks
  • 2 bay leaves
  • 3 tbsp. whole cloves

Combine all of the ingredients with water in a sauce pan and bring to a boil.  Alternatively, you can add cranberry juice or apple juice instead of the water for a little variation of scent. Reduce heat and simmer as long as desired.  Add additional water as needed to prevent the mixture from drying up. When done, this can be stored in an air tight container in the refrigerator and used again for up to a week.

Leave for coworkers, a teacher, or neighbours!
/home/wpcom/public_html/wp-content/blogs.dir/fd1/75222657/files/2014/12/img_3204.jpg


Merry Christmas all and Happy Craftings!!

❤ Miss Amanda

DIY Dip Mix and Hot Chocolate Christmas Ornaments

I love Christmas. Particularly, I love giving gifts.  I love the feeling of watching someone open up a gift I have found for them that I truly know they will enjoy.  In my mind, it truly is ‘the most wonderful time of the year”.

That being said, I decided I would make quite a few of my gifts this year, like the arm knitting and finger knitting projects I have written about already.  However, for these news projects, I did not have to work alone!  My bestest friend Miss Allison came over and we had an afternoon of crafting, movie watching, and food eating.

Both of these projects are from the same lady’s blog, bubblynaturecreations.com.

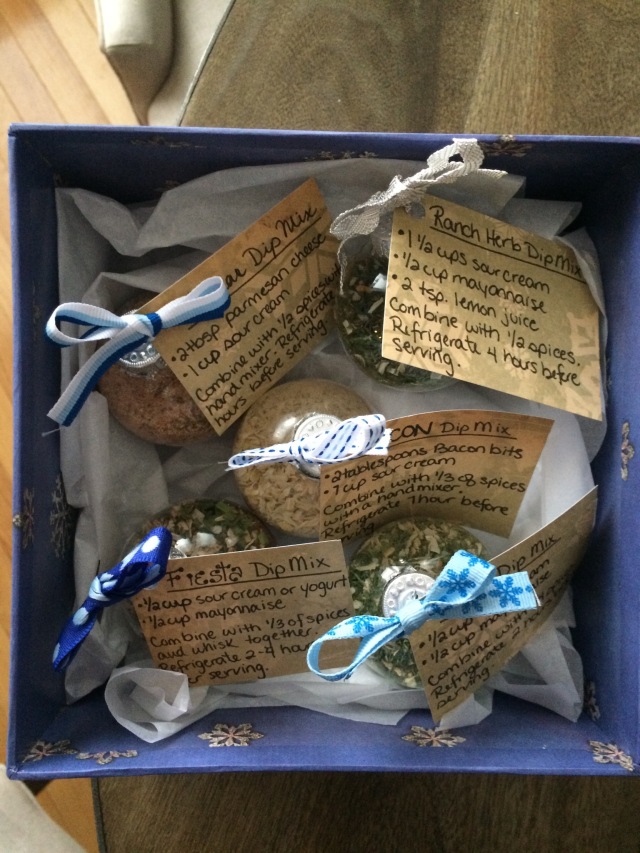
The glass ornaments we used were from Michael’s and the ribbon is from the 1$ aisle at Target.  All the spices can be found at your local grocer’s and I went to bulk barn for the tiny chocolate chips and bulk white and regular hot chocolate. You will also need foil to close up the tops. Lastly, make sure you have a funnel on hand! Trust us….. You will need it!

The Dip Mix Ornaments

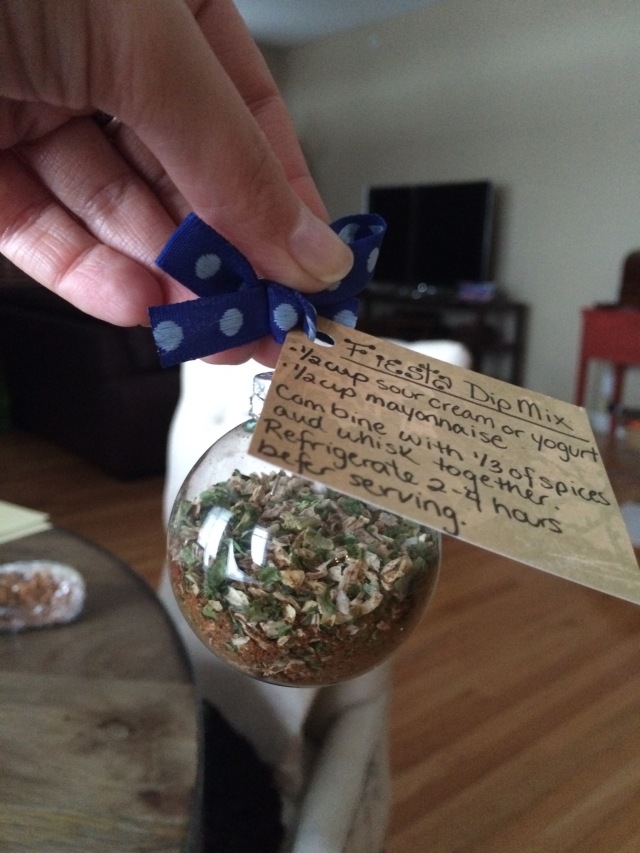
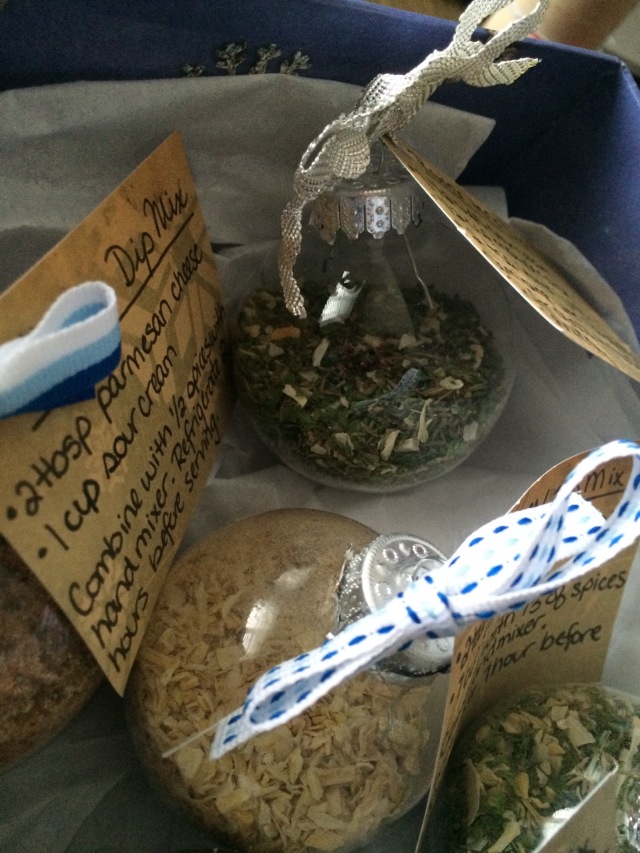
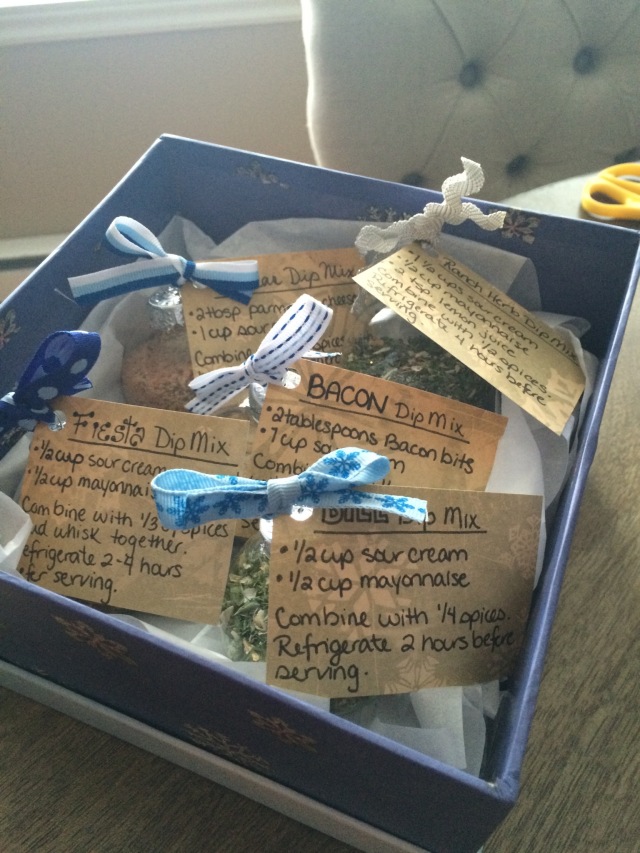
The 5 dip mixes that are created for this adorable gift are Dill, Bacon, Fiesta, Italian, and Herb Ranch.  Be aware that two mixes call for items that we couldn’t find to place inside – non-refrigerated parmesan cheese and non-refiregerated bacon bits. This just means that on the instruction card we have written down that the person must add them themselves.
IMG_3035.JPG
br />
IMG_3038.JPG

IMG_3040.JPG

IMG_3039.JPG
 

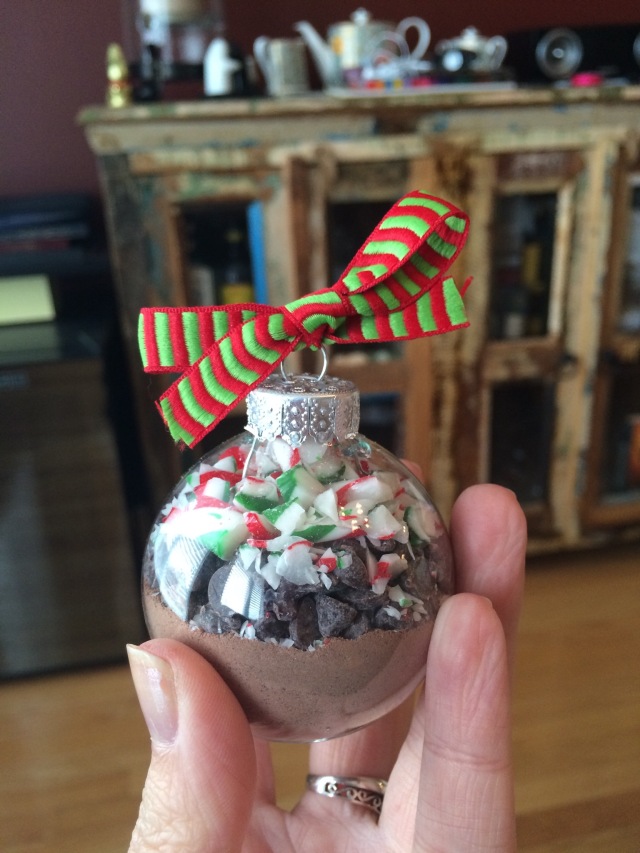
Hot Chocolate Ornaments

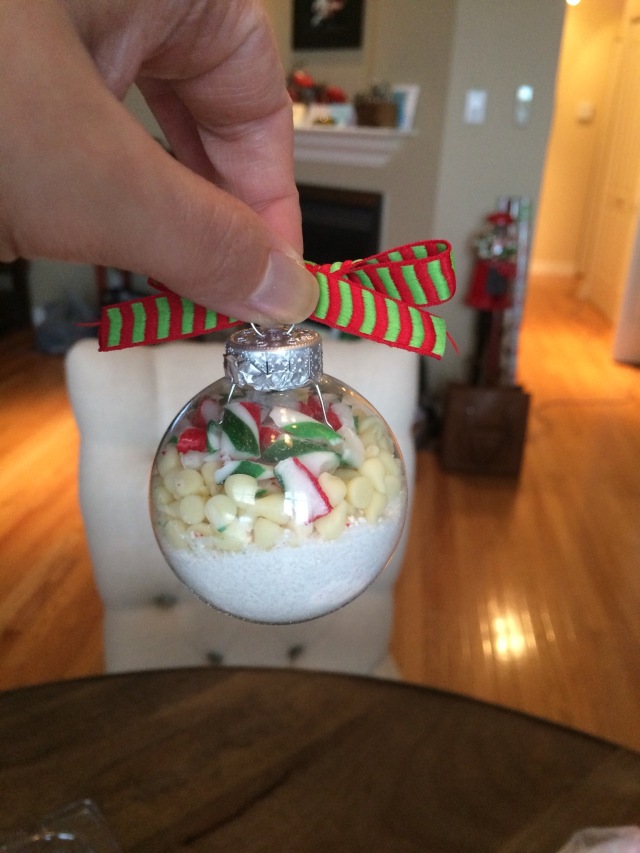
For these ornaments, we used hot chocolate, mini chips and candy canes purchased from the Bulk Barn.  The funnel comes in handy again here!

IMG_3034.JPG

IMG_3033.JPG


Happy crafting and gift giving!